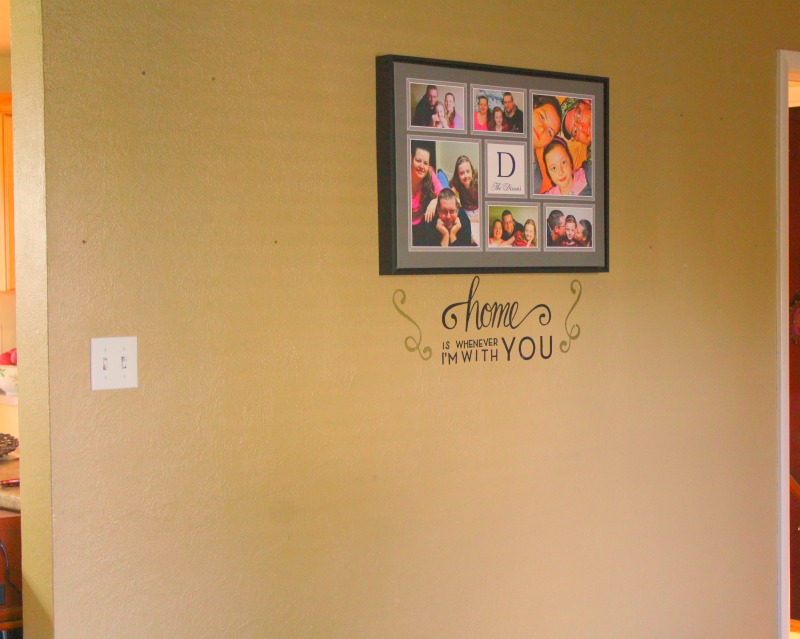
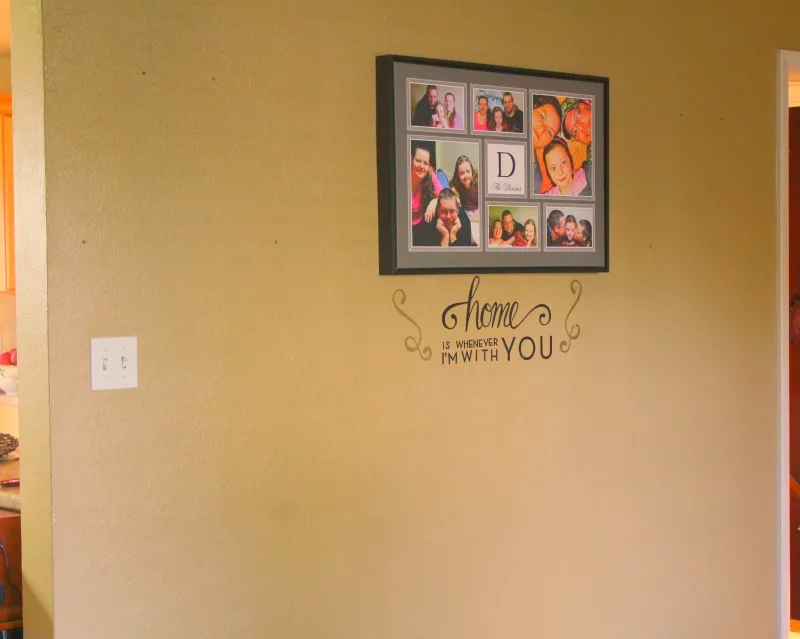
All of the DIY Wood Accent Wall ideas I have found online were out of my price range but I really wanted to add a focal point to my living room wall.
So, I didn’t let this deter me and you shouldn’t either because I am sharing my top tips for enhancing your space on a budget.
When I began planning this DIY project I decided to explore the different wooden material options in an attempt to save a few bucks.
While I have found many feature wall ideas online, every step-by-step tutorial I could find called for expensive wood paneling, which was not aligned with my budget-friendly approach.
When creating my own design, I made a deliberate choice to delve into various wooden material alternatives, aiming to achieve my goal while keeping costs in check.
Determined to strike a balance between creativity and affordability, I embarked on crafting my own design.
Keep reading this tutorial to learn more about this cost-effective solution and some DIY wood accent wall ideas that will enhance your space.


Keep in mind that this post contains affiliate links which means that through the Amazon Services LLC associates program, I will receive a small portion of the sale at no additional cost to you.
DIY Wood Accent Wall Ideas on a Budget
When aiming to craft an affordable wood slat accent wall, employing smart strategies to economize on wood materials is key.
Using reclaimed wood in small spaces can create a big impact while saving you money on expensive materials.
Let’s consider the best options for choosing the materials for your home improvement project.
DIY Wood Accent Wall Using Plywood
Seek out sanded plywood sheets boasting a pleasing grain pattern. Plywood offers a versatile canvas for your creative vision and can be transformed into slats for a dynamic accent wall.
It proves to be an economical and versatile option for crafting a stunning wood plank accent wall without exceeding your budget.
Its affordability, combined with a smooth surface and pleasing grain pattern, makes it an excellent choice for transforming into dynamic slats that enhance your space’s aesthetic.
Additionally, plywood’s lightweight nature simplifies installation and offers creative potential beyond your accent wall project.
DIY Wood Accent Wall Using Pallet Wood
Harness the potential of reclaimed pallet wood, often attainable at minimal cost or even free from local businesses.
Embrace the rustic charm of repurposed wood to lend authenticity to your space.
By doing so, you infuse your space with the authentic rustic charm of repurposed wood, creating a distinctive ambiance that resonates with character and uniqueness.
A perfect example of how versatile pallet wood can be is this post sharing How to Make a DIY Pallet Bed Frame.

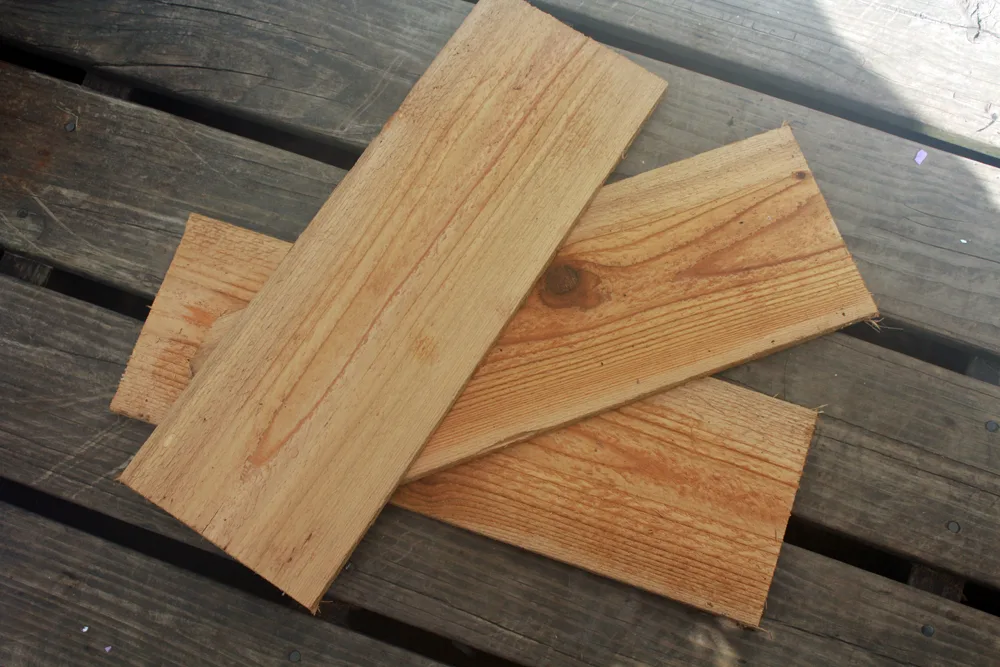
DIY Wood Accent Wall Using Pine or Cedar Fence Boards
Browse local hardware stores to discover pine or cedar fence boards, conveniently accessible at a wallet-friendly price point.
These versatile boards not only offer affordability but also possess the potential to cultivate an ambiance of coziness and approachability in your space.
By incorporating these boards into your design, you introduce elements that resonate with warmth, making your surroundings all the more inviting and appealing.
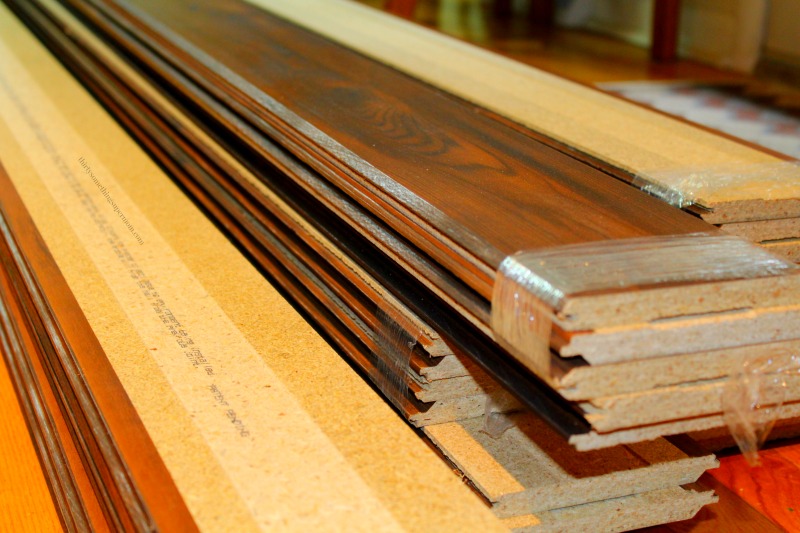
Pre-Finished Knotty Alder Planks
Consider using pre-finished knotty alder planks for your diy wood accent wall ideas in order to save time and money.
The simplicity of using Pre-finished Knotty Alder planks lies in their ready-to-install nature, making the process of creating a stunning wood accent wall remarkably straightforward as well as budget-friendly, which is why I chose this material for my project.
These pre-finished planks are precisely cut and coated with a protective finish, eliminating the need for extensive sanding, staining, or finishing work.
This convenience significantly reduces the time and effort required for preparation, allowing you to focus on the creative aspects of your project.
The consistent finish on each plank ensures a uniform appearance across the entire accent wall, contributing to a polished and professional result.
Additionally, the knotty alder wood imparts a rustic charm and natural texture that can instantly elevate the ambiance of your space.
By opting for Pre-finished Knotty Alder planks, you not only streamline the installation process but also achieve a high-quality outcome without compromising on the authentic look and feel of a wooden accent wall.
This approach is ideal for those seeking a hassle-free way to bring the warmth and character of wood into their living spaces.

Tips for Choosing a Wall in Your Own Home
When choosing a wall for this easy project, it’s a good idea to keep these points in mind before tackling this home project.
Where Do You Put Wood Accent Walls?
There are a variety of things to take into consideration when choosing where to put wood accent walls in your home.
The following architectural features of your home should be considered before choosing a location for a wood accent wall.
- Visibility: Opt for a wall that’s easily seen within the room, an entrance view of an entire wall would be ideal.
- Natural Light: A great way to highlight wood feature walls is with the use of natural light. Choose a well-lit wall to bring out textures and colors.
- Specific Architectural Features: Highlight alcoves, their surrounding walls, or brick accent walls surrounding a fireplace for a nice finished look. Another great option for accenting architectural features is to apply wooden slats on a wall of windows.
- Obstructions: Pick a wall with fewer windows or furniture for a modern accent wall that allows the design to take center stage or disguise electrical outlets with geometric patterns.
- Entry Points: Consider walls near entryways for a simple way to create a strong first impression.
- Furniture Match: Complement or contrast with your furniture by creating a shiplap wall with a finish that harmonizes seamlessly or adds striking visual juxtaposition, enhancing the overall ambiance of your room.
How Do I Choose an Accent Wall Location?
Selecting the ideal location for an accent wall can significantly enhance the aesthetic appeal and atmosphere of a room.
Let’s explore various rooms within a house along with compelling reasons to choose each space for your accent wall.
- Bedroom: Accent the wall behind the bed for a stunning effect. Add wall art with unique shapes and a little bright color to make the wood accents pop.
- Bathroom and Kitchen: Create unique accent walls behind a vanity in a bathroom to create visual interest in your home decor. Or create a modern look with a herringbone pattern as a backsplash in the kitchen.
- Dining Room: Opt for a wall that’s easily seen from the dining area, creating a focal point during meals.
- Master Bedroom: Create a batten wall behind the bed for a tranquil and stylish retreat.
- Home Office: Consider a wall that’s visible during video calls, for an easy way to add professionalism to your workspace.
DIY Wood Accent Wall Ideas for Choosing Your Design
The best way to visualize options without unnecessary nail holes is to use painter’s tape. This is an easy method for working out different ways to implement wood boards into your space.
Another great idea for figuring out your favorite ways to line up your wooden accent wall in your space is to sketch the design out using a pencil.
You can get an idea of how to arrange the wood pieces and see how your design will make the space feel before you commit to pattern.
This method can help you decide if you want a batten design, a rustic look, a geometric wood accent wall, or a modern wood accent wall.
Another way to decide how to create a unique look for your space is to explore various wood staining or painting techniques.
Experiment with paint color or stain on small wood samples before committing to your accent wall.
This hands-on approach allows you to see how different finishes and different color interact with your space’s lighting and existing decor.
By combining these methods of visualizing and experimenting, you can confidently craft a wooden accent wall that not only enhances your space but also reflects your personal style and design preferences.
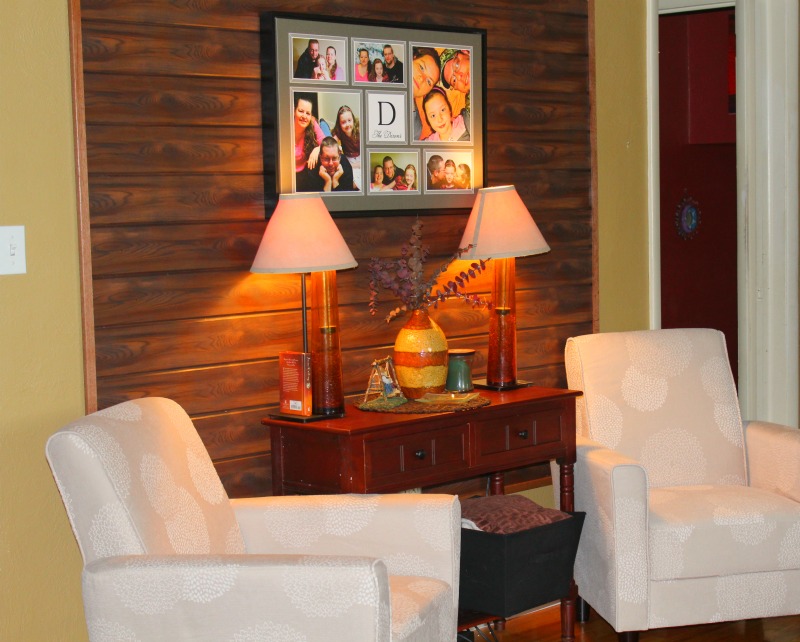

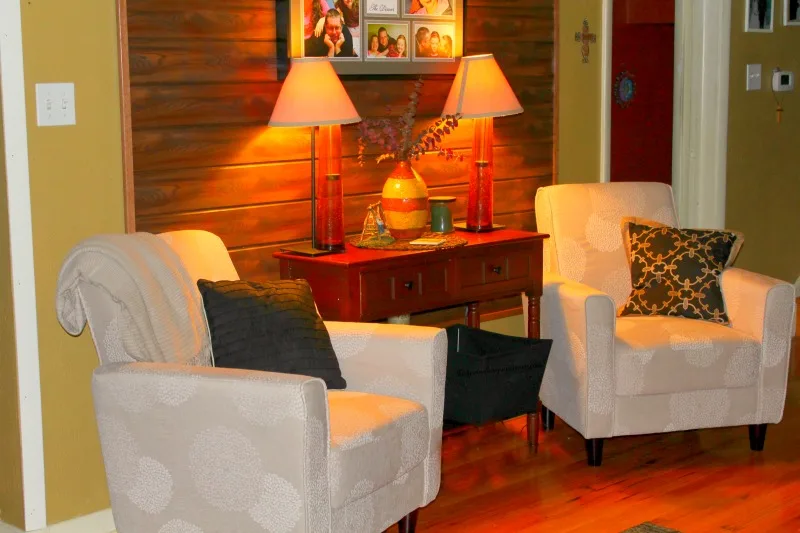
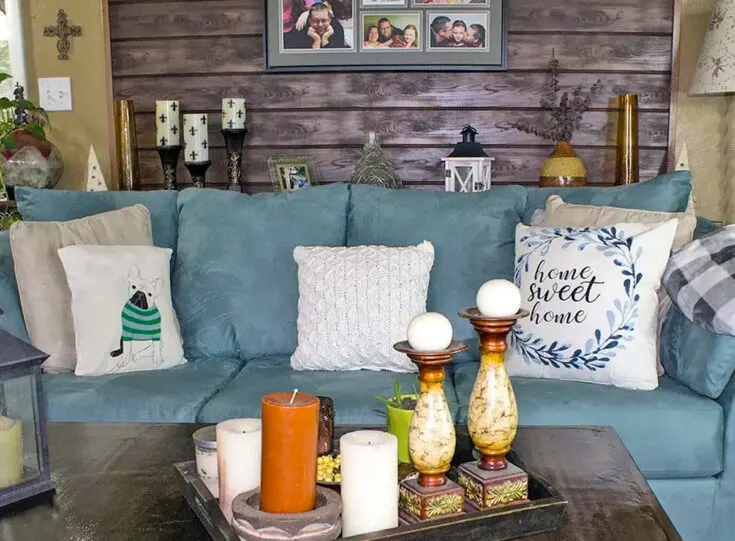
DIY Wood Accent Wall Ideas
The first thing we did when tackling this weekend project was head to our local hardware store. This is where I picked up my planks and basic tools.
I chose the pre-finished knotty alder planks which I picked up for $2.99 per 8-foot plank.
This was not only the easiest way to save me some time on the finishing touches but it was also an inexpensive way to approach this project.
It allowed me to skip right past the staining part which saved me so much money and time.
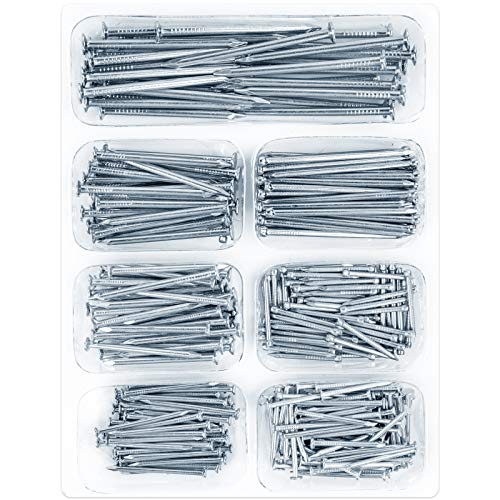
I also picked up 4 sticks of oak trim as well as a box of trim nails to complete this project.
This isn’t the first time I tackled a home improvement project so I already have most of the tools Home Depot and Menards are selling.
This wood wall design idea is pretty basic so you won’t need a brad nailer, nail gun, or too many fancy tools to create your own plank wall.
Materials Needed for DIY Wood Accent Wall
The list of materials and tools needed for this DIY Wood Accent project includes:
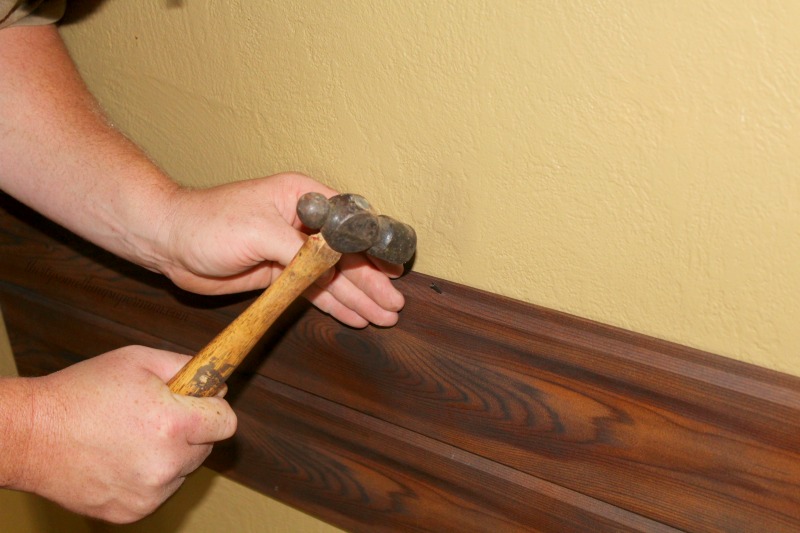
- Ball peen hammer
- Trim nails
- Compound Miter Saw
- Table saw
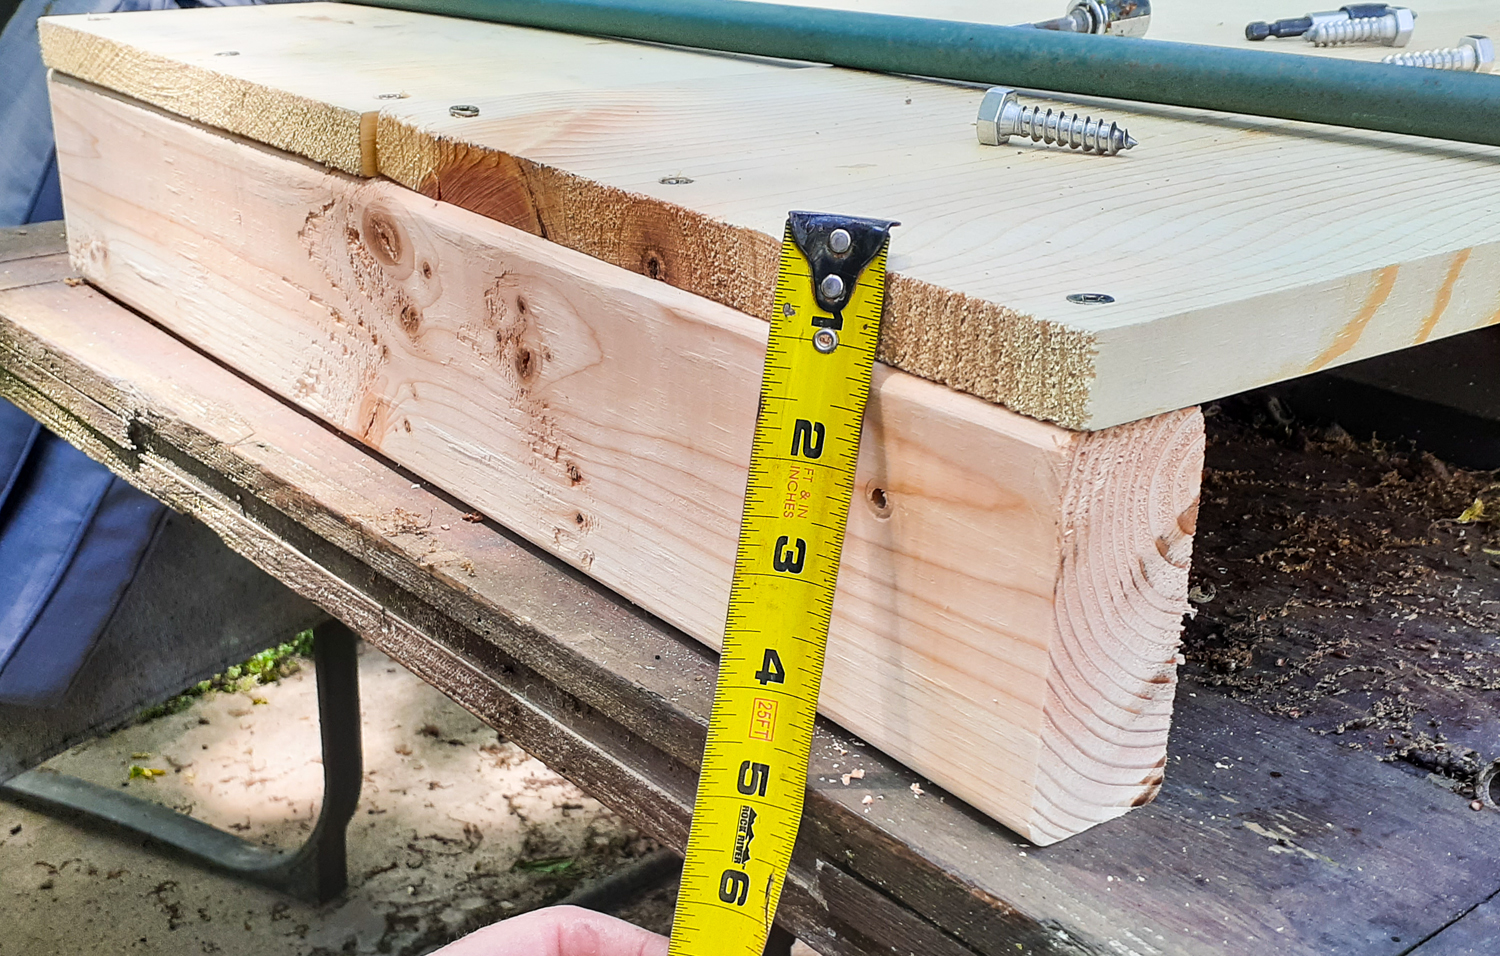
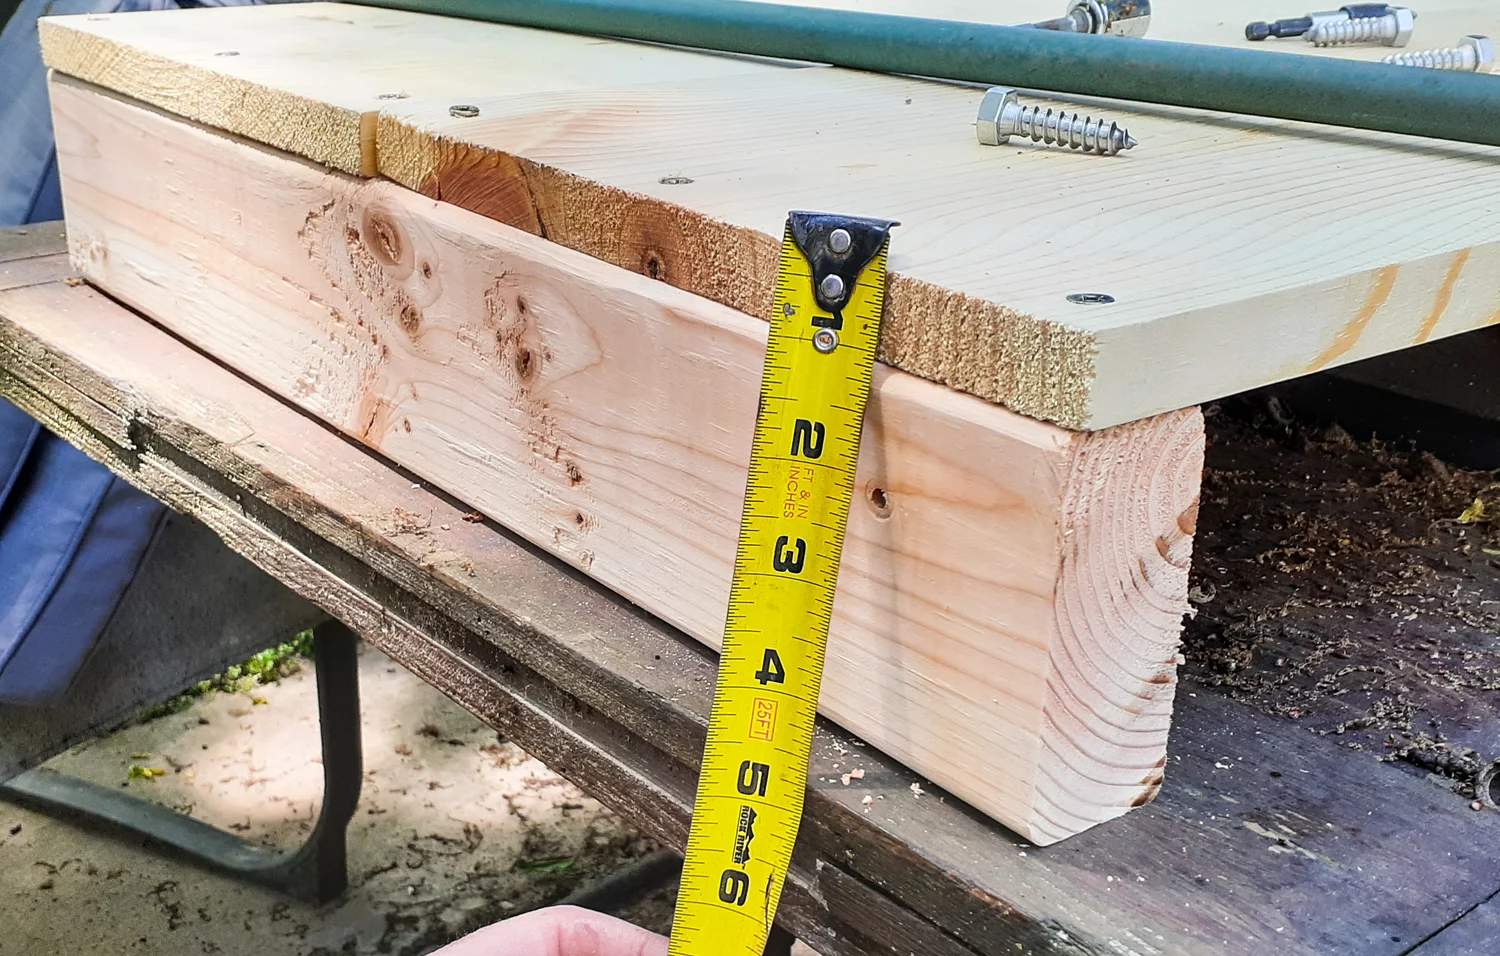
- Tape measure
- Drill
- 4 ft. Level
- Oak Trim
- Pre-finished Knotty Alder Planks

How to Build a DIY Wood Accent Wall
The first step in creating your budget-friendly plank wall is to measure the wall to decide how many planks you will need.
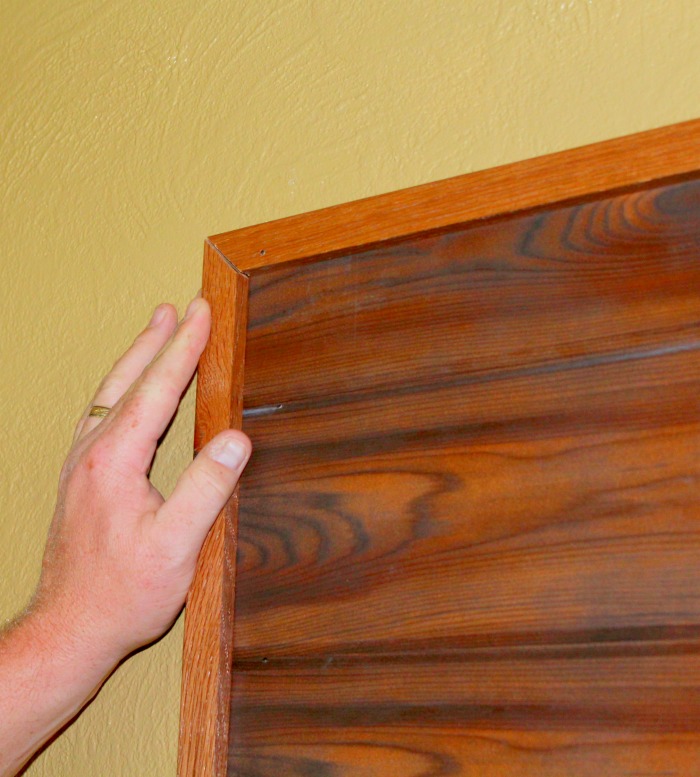
I decided to center my planks and surround them with trim to create a picture frame-shaped slat wall.
You will also need to decide how long you want your planks to be before moving on to the next step. I decided 6 feet was the perfect choice for the blank wall in my living room.
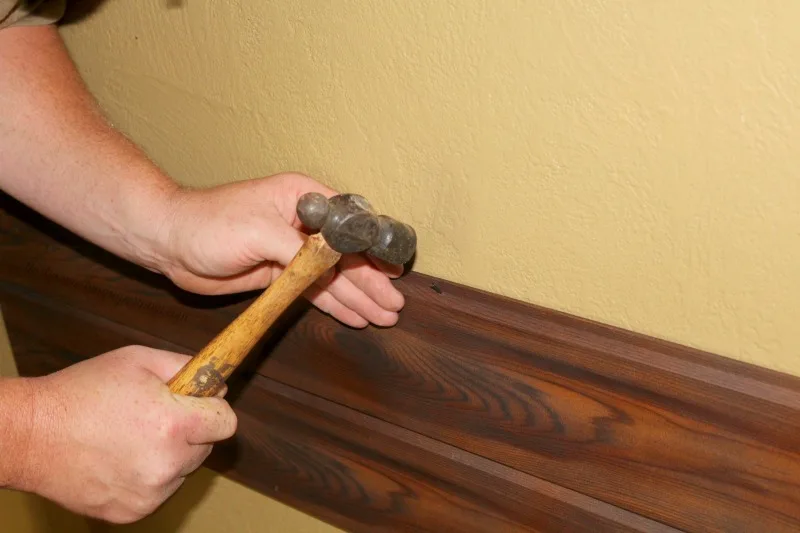
Use a miter saw to cut the planks to fit your wall then add your first plank, starting at the bottom, use a level to make sure it is straight, and then secure it with trim nails.
When adding the next plank, line up the tongue and groove sections in a straight line with each addition of the wood planks.
After you have cut your first plank you should be able to keep that measurement to cut the rest of the planks for your DIY accent wall.
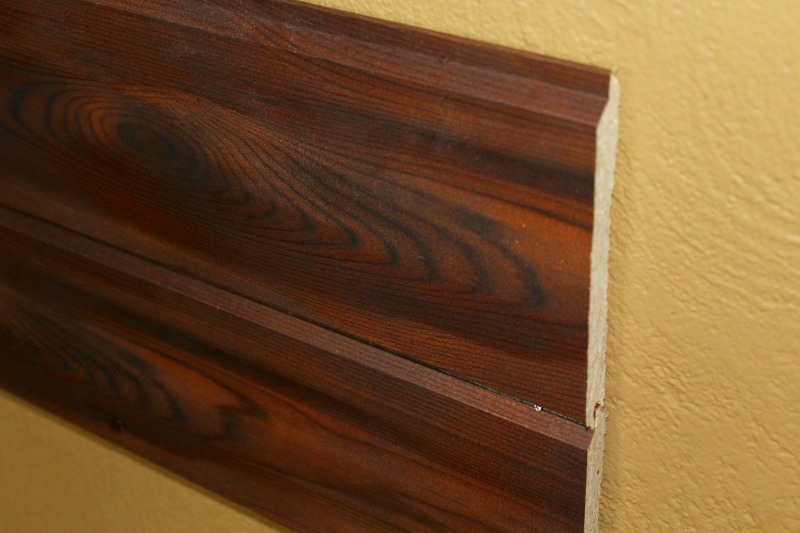
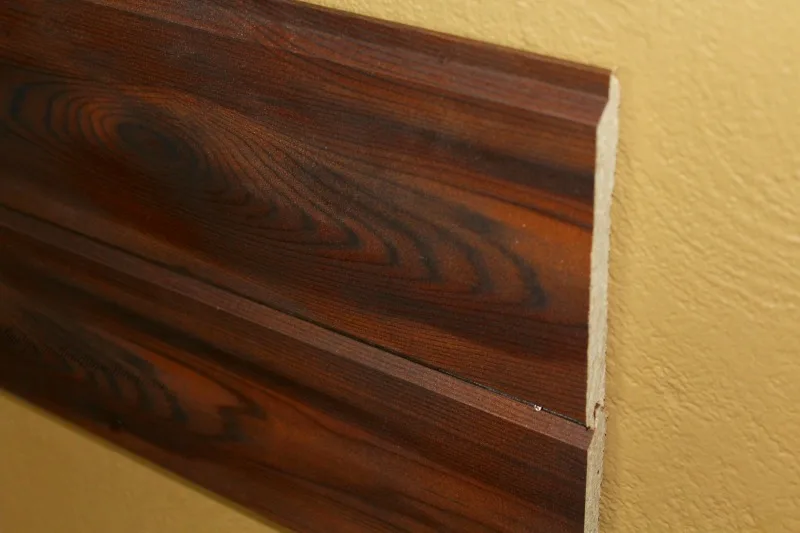
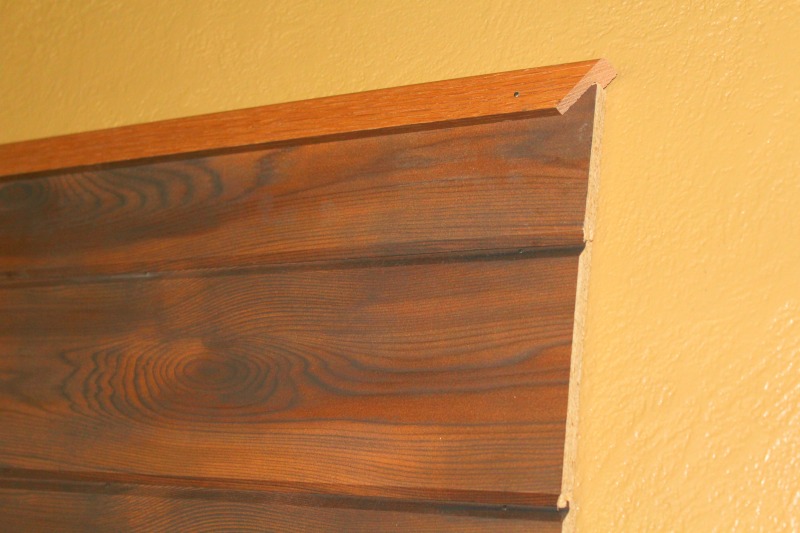
When you reach the top plank, use a table saw to cut the tongue off of the edge to allow the trim to fit the seam.
This step is not necessary when using pine boards or any classic board without the tongue and groove sections.
Adding the Trim
Since I used pre-finished planks, after cutting the ends I was left with an unfinished edge, that’s where the trim pieces came into play.
Measure the trim to fit each side of the planks and cut the edges at a 45-degree angle starting with the top plank.
Pre-drill holes into your oak trim boards to allow the trim nails to easily penetrate the wood.
Continue adding trim to each side and securing with trim nails until your entire plank wall has been framed with trim.
Other than saving money on this plank accent wall, another benefit to using the planks we did is that you can hardly see the nails when finished.
So there is no need to bust out the caulk and fill in small nail holes or gaps.

Variations on this DIY Wood Accent Wall
You can create a similar design to the one featured here if you pick up the same materials, but you can also leverage the top tips in this post to craft your own distinctive plank wall on a budget.
For a fresh twist, consider embarking on a batten accent wall project with MDF boards – an approach that offers both cost-effectiveness and intriguing design elements.
By incorporating a trim accent wall and mastering the art of the right angle, you’re set to create a plank wall that seamlessly marries aesthetics with affordability.
Alternatively, explore the captivating realm of a herringbone-patterned accent wall.
By arranging the wood boards in this distinctive V-shaped configuration, you introduce a dynamic visual element that adds a unique charm to your space.
For a fresh twist, consider embracing the allure of a shiplap accent wall.
By installing overlapping wooden boards with distinctive horizontal gaps, you infuse your space with a timeless and rustic aesthetic that radiates charm.
I hope these tips have helped you to confidently craft a wooden accent wall that not only enhances your space but also reflects your personal style without breaking your budget!

More DIYs for the Home
No Sew DIY Farmhouse Curtains– Elevate your interior with charming farmhouse curtains that add a touch of rustic elegance to any room.
Discover creative ways to create window treatments that seamlessly complement your wood accent wall, harmonizing textures, and aesthetics without the need for a sewing machine.
How to Build a Retaining Wall the Right Way– If you’re looking to enhance your outdoor space, consider delving into the art of building a retaining wall.
This comprehensive guide ensures you tackle the project with confidence, resulting in a sturdy and visually appealing addition to your landscape without the hefty price tag.
How to Make Your Own Garden Light Post Easy Upcycle– Extend your creative prowess to your outdoor haven by crafting a unique garden light post.
This upcycling project showcases how to transform everyday items into functional and stylish outdoor lighting, infusing your garden with a warm and inviting glow.
Want more DIY projects? Sign up for the free newsletter or follow along on social media so you never miss a post again.

1 Hour DIY Wood Accent Wall Ideas for Less than $75
Learn how to create a DIY Wood Accent Wall in one hour, for less than $75.
Materials
- Trim Nails
- Oak Trim
- Pre-finished Knotty Alder planks
Tools
- Ball Peen Hammer
- Compound Miter Saw
- Table Saw
- Tape Measure
- Drill
- 4 ft. Level
Instructions
- The first step in creating your budget-friendly plank wall is to measure the wall to decide how many planks you will need. I decided to center my planks and surround them with trim to create a picture frame-shaped slat wall.
- You will also need to decide how long you want your planks to be before moving on to the next step. I decided 6 feet was the perfect choice for the blank wall in my living room.
- Use a miter saw to cut the planks to fit your wall then add your first plank, starting at the bottom, use a level to make sure it is straight, and then secure it with trim nails.
- When adding the next plank, line up the tongue and groove sections in a straight line with each addition of the wood planks.
- After you have cut your first plank you should be able to keep that measurement to cut the rest of the planks for your DIY accent wall.
- When you reach the top plank, use a table saw to cut the tongue off of the edge to allow the trim to fit the seam. This step is not necessary when using pine boards or any classic board without the tongue and groove sections.
- Since I used pre-finished planks, after cutting the ends I was left with an unfinished edge, that's where the trim pieces came into play.
- Measure the trim to fit each side of the planks and cut the edges at a 45-degree angle starting with the top plank. Pre-drill holes into your oak trim boards to allow the trim nails to easily penetrate the wood.
- Continue adding trim to each side and securing with trim nails until your entire plank wall has been framed with trim.
- Other than saving money on this plank accent wall, another benefit to using the planks we did is that you can hardly see the nails when finished. So there is no need to bust out the caulk and fill in small nail holes or gaps.
Notes
Read the full post for variations on this project using different materials and methods for your DIY Wood Plank Wall.
Recommended Products
As an Amazon Associate and member of other affiliate programs, I earn from qualifying purchases.


About Thirty Something Super Mom


My journey started after a Crohn's disease diagnosis, inspiring a commitment to well-being. This site shares my distinctive approach to healthy living with my collection of nutritious recipes that boast authentic flavors, mimicking the indulgence of traditional dishes. I love sharing guilt free recipes for low carb, keto, gluten-free, paleo, and the specific carbohydrate diet. I also share tips on natural living, including homemade cleaners and cleaning hacks. I also share my experience as a veterinary technician and pet groomer, to integrate pet health tips, homemade dog food recipes, and grooming insights to ensure your pets thrive.
Chrysa Duran
Saturday 29th of October 2016
This looks like something simple that I could do to update the look of my living room. Thanks for the inspiration!
Myteenguide
Saturday 29th of October 2016
Great look of a wood! :) I should use a wood like this
Gabriel
Saturday 29th of October 2016
We didn't do a wall but we actually did do the bathroom ceiling in tongue and groove plank similar to this. I looks amazing.
Nancy @ whispered inspirations
Friday 28th of October 2016
Great job! We were actually looking to turn a wall into a plank wall also!
Lynndee
Friday 28th of October 2016
What a neat idea! I really love it! It sure made the room look cozy. Love the furniture too!