I never thought I could give my kitchen a real makeover — until I discovered peel and stick tiles. As someone who isn’t very handy and doesn’t have any tiling experience, I was amazed at how easily these tiles helped me transform my space. I didn’t need any grout, power tools, or a contractor, just a few hours and the right product.
In this post, I’ll show you exactly how I used peel and stick tiles to transform my kitchen, including before and after photos, simple installation tips, and everything I learned along the way. If you’re looking for a fast and affordable way to give your kitchen a facelift, even if you’re not super crafty, this could be the perfect weekend project for you!
Why I Chose Peel and Stick Tiles
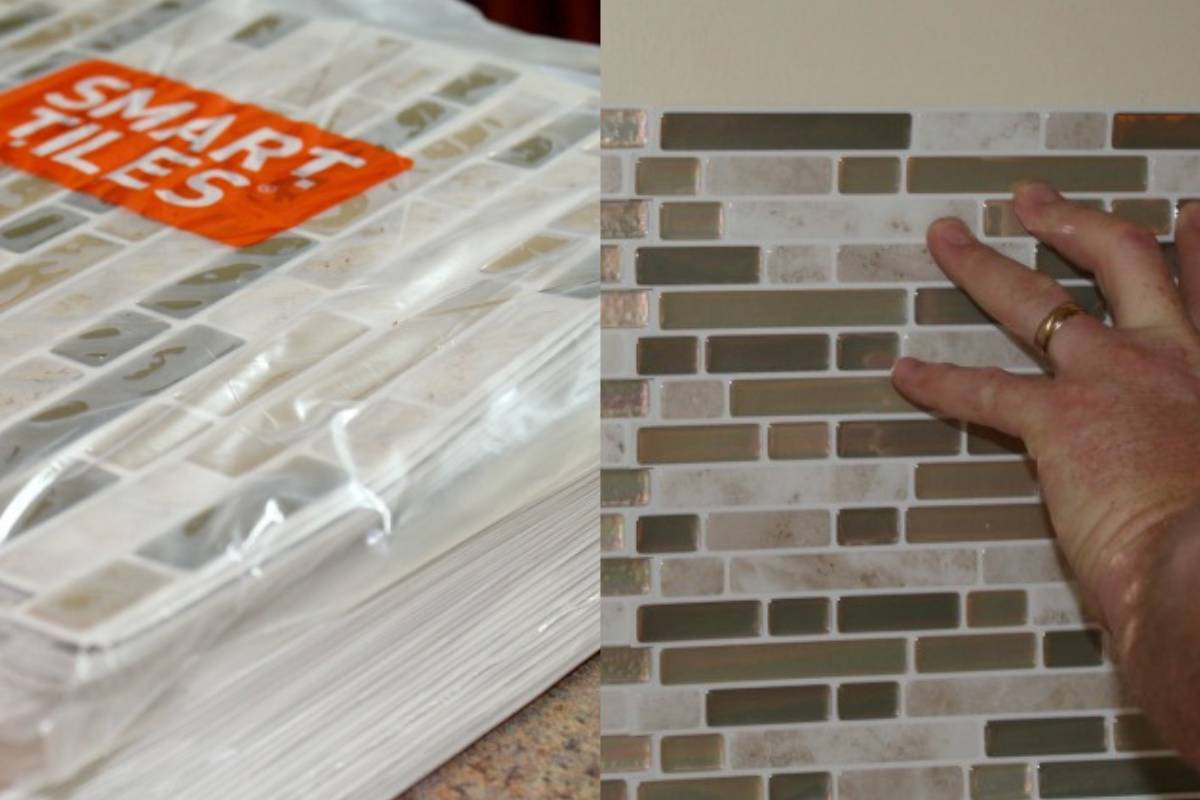
After looking into traditional tile options, I realized the cost, tools, and time involved were just too much. I wanted a kitchen backsplash that looked great, was easy to install, and didn’t require grout, tile saws, or professional help. That’s when I discovered Smart Tiles, and I was instantly intrigued.
- No special tools required
- No need for grout or mortar
- Can be done in just a couple of hours
- Removable (great for renters!)
- Stylish and realistic-looking
What You’ll Need for This Project
- Peel and stick tiles (I used Smart Tiles)
- Scissors or a utility knife
- Measuring tape
- A clean cloth to prep the surface
That’s it! No fancy tools, no expensive supplies, just a little time and patience.
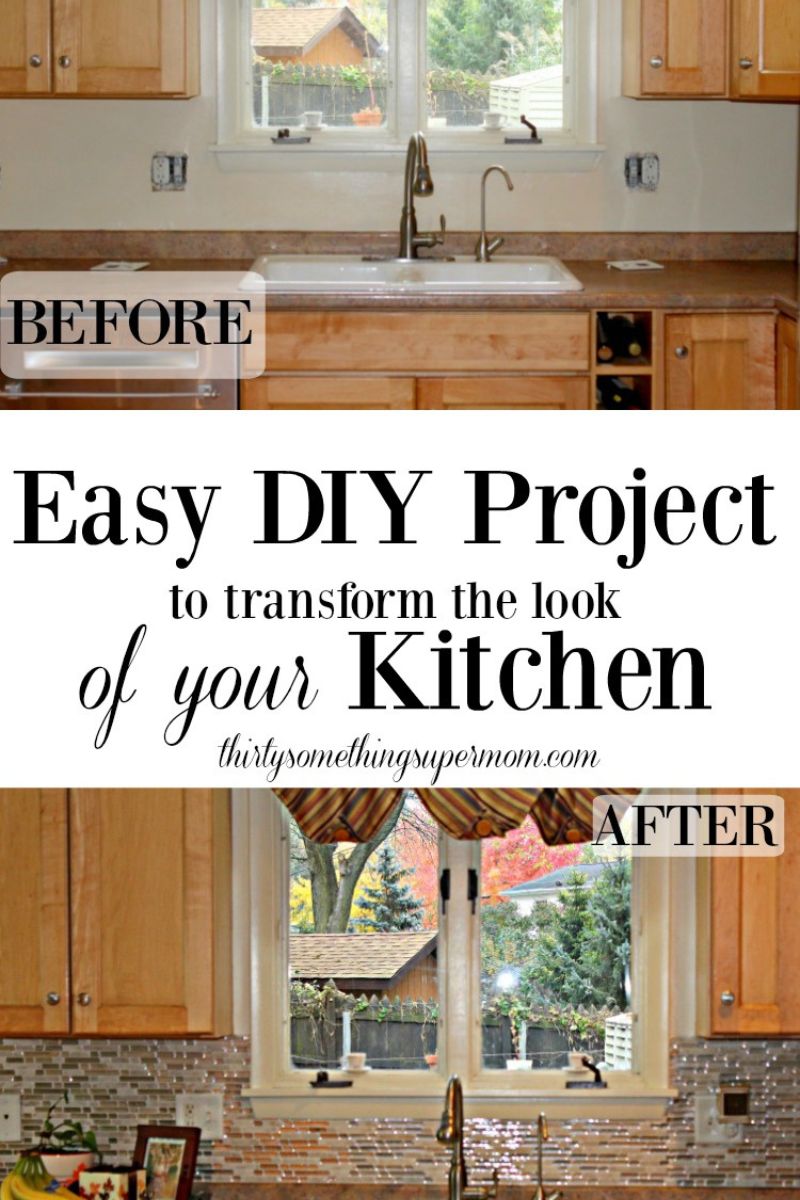
Before the Makeover
Here’s what my kitchen looked like before installing the peel and stick tiles. It felt a little plain and outdated, especially around the sink and countertop.

Step-by-Step: How I Installed Peel and Stick Tiles
- Clean the wall surface well and let it dry.
- Plan your layout by lining up the first row without sticking.
- Peel off the backing and press the tile onto the wall, smoothing as you go.
- Cut tiles to fit edges or corners with scissors or a utility knife.
- Repeat until your entire backsplash is covered.
I was shocked by how quickly the space started to come together. There was no dust, no power tools, and no stress!
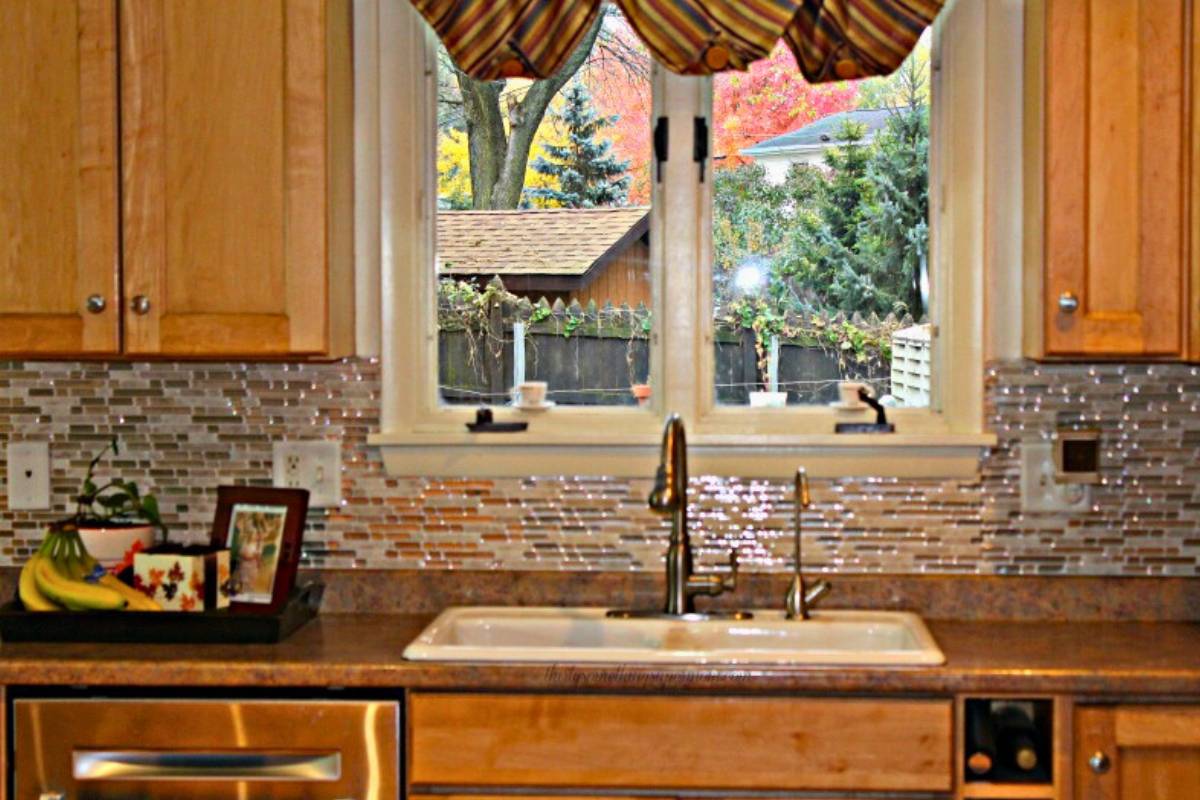
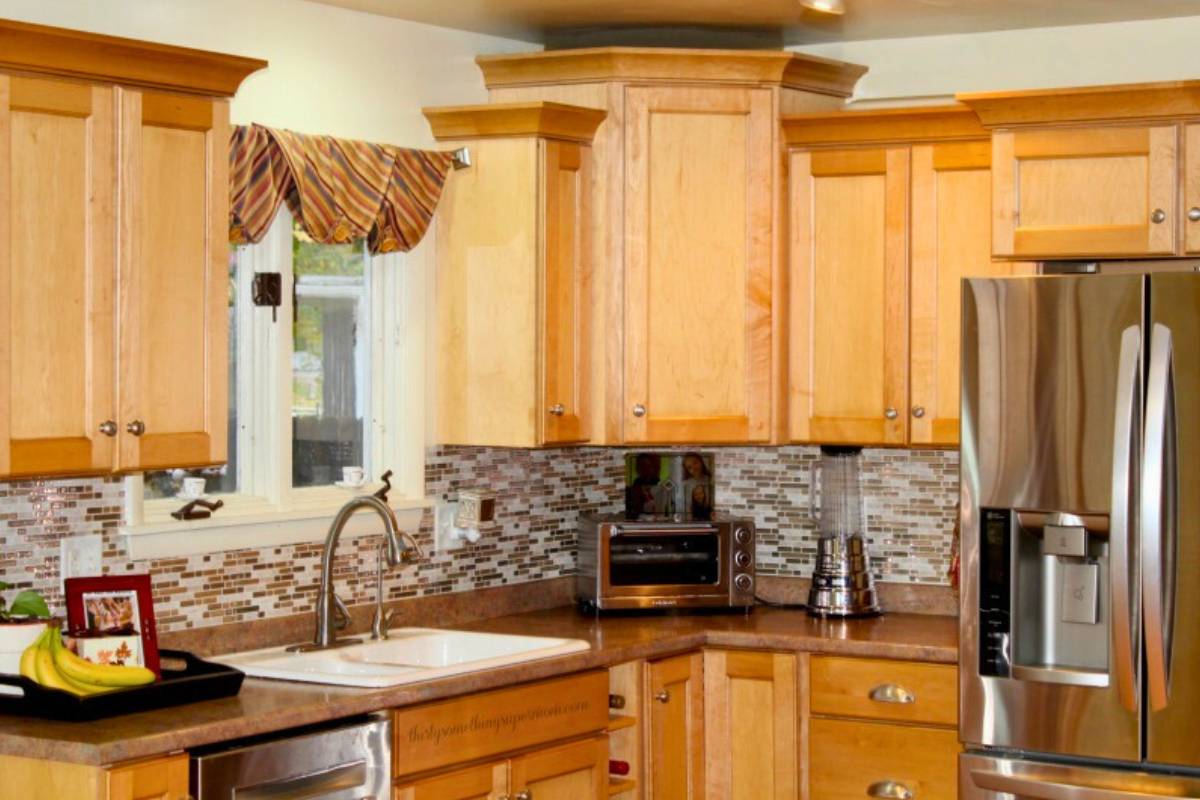
After Photos – My Kitchen Makeover Reveal
And here’s the finished look! The difference is amazing for such a simple project. I love how the tiles made my kitchen feel more modern and clean without spending a fortune.
Would I Recommend Peel and Stick Tiles?
Yes and especially if you’re a beginner like me! These tiles helped me:
- Add a custom, designer feel to my kitchen
- Avoid expensive tools or messy installations
- Complete the project in just one afternoon
Whether you’re renting or just not ready for a full renovation, I highly recommend giving peel and stick tiles a try.
Quick Tips for a Successful Install
- Make sure your surface is completely clean and dry
- Start in a visible corner so the layout looks even
- Don’t rush, measure and cut carefully
- Keep a damp cloth nearby in case you need to reposition
- If you’re nervous about bubbles, use a small roller or credit card to smooth them out
More DIY Posts You’ll Love
- 1 Hour DIY Wood Accent Wall for Less than $75
- DIY Canvas Frame
- Upcycled Solar Lamp Post
- DIY Tray Upcycling Project – Trash to Treasure Craft
Want more easy DIY inspiration? Follow along on Pinterest and sign up for the free newsletter so you never miss another post again.
About Thirty Something Super Mom

My journey started after a Crohn's disease diagnosis, inspiring a commitment to well-being. This site shares my distinctive approach to healthy living with my collection of nutritious recipes that boast authentic flavors, mimicking the indulgence of traditional dishes. I love sharing guilt free recipes for low carb, keto, gluten-free, paleo, and the specific carbohydrate diet. I also share tips on natural living, including homemade cleaners and cleaning hacks. I also share my experience as a veterinary technician and pet groomer, to integrate pet health tips, homemade dog food recipes, and grooming insights to ensure your pets thrive.
That looks great. I’m currently trying to decide on my new back splash.
Thanks Jennifer, choosing the pattern was the hardest part for me!
I love that! A great looking backsplash can completely change the look of your kitchen.
What! I never would have guessed those were peel and stick! It looks incredible
WOW! You did a great job – I love it! Getting nice tiles always does magic. I’m definitely checking out Smart Tile’s website. My kitchen needs a bit of sprucin’ up.
This is an awesome easy DIY kitchen makeover. I love the titles you chose and I would have probably chose the same ones too. These titles make the kitchen look gorgeous. Thanks for sharing your awesome new kitchen.
Wow this made such an amazing difference. Like huge. I really love it! This is a fabulous idea, and I thank you for sharing. This is something I can do, and it wont break the bank.
I love the look of these! It really changed the look of your kitchen. I will have to look at using these for my kitchen.
Those make your kitchen look so much better. We already have a tiled backsplash in our kitchen. It was added when they built our house. I will have to look into these for my next home though.
that backsplash looks awesome! I Love how easy it looks to get done!
What a transformation! I certainly love the “after”. I have to show this to the hubs. Our kitchen definitely needs updating.
Oh wow, what a difference. I rent my apartment and even though my landlord said I could basically do what I want to update it, I don’t want to put a lot of money into something I don’t own. This however, would really liven my kitchen up and I could do it myself thus saving a contractor.
Wow, this is super cool! I’ve been thinking about painting my kitchen but I think this is so much better than that. Will add a new look and save me a bit.
We just did new laminate countertops and tile backspash also. It make an unbelievable difference in our kitchen.
WOW! You really made an awesome transformation to your kitchen. I cant believe how great those tiles look compared to the before picture. The tiles look very easy to use as well. I thought tiles needed to be placed one by one. What a great product!
Wow, what a difference! Your kitchen looks so awesome!! I wish I could see it in person 🙁
Omg your kitchen is looking pretty fabulous!!! I’m obsessed with how awesome your back splash looks!!! Came out so nice
You didn’t go into detail about how it worked around your outlets. Do you have any pointers or information that you could provide? We would like to do this in a home that we are building BUT if it is too much a pain in the butt, we may pass. Overall, around how much did the project cost?
Hi Heather, thanks for stopping by! I should have written a little bit about the outlets and how easy it was to cut the tiles to fit and I will update the post with that information. Thanks for pointing that out! It was really simple and only required a box cutter and a pencil to mark the lines. There are some videos on the Smart Tiles website that show this process and maybe that will help you decide if this is right for you. Every project will vary in cost due to the amount needed for the job, I have a large kitchen and needed 40 tiles so this project cost about $350. Way cheaper than what I was quoted by contractors to install a backsplash. I am pleased with the results and am so glad we went this route.
Backsplashes are one of my favorite diy kitchen updates that anyone can do. They are usually the first thing to catch my eye in a kitchen too!