This post sharing how to hang a reclaimed door in an existing jamb is a project from the book: BUILDING WITH SECONDHAND STUFF: How to Reclaim, Repurpose, Re-use & Upcycle Salvage & Leftover Materials. Photos courtesy of Cool Springs Press. This post may contain affiliate links which means I receive a small portion of the sale if you make a purchase.
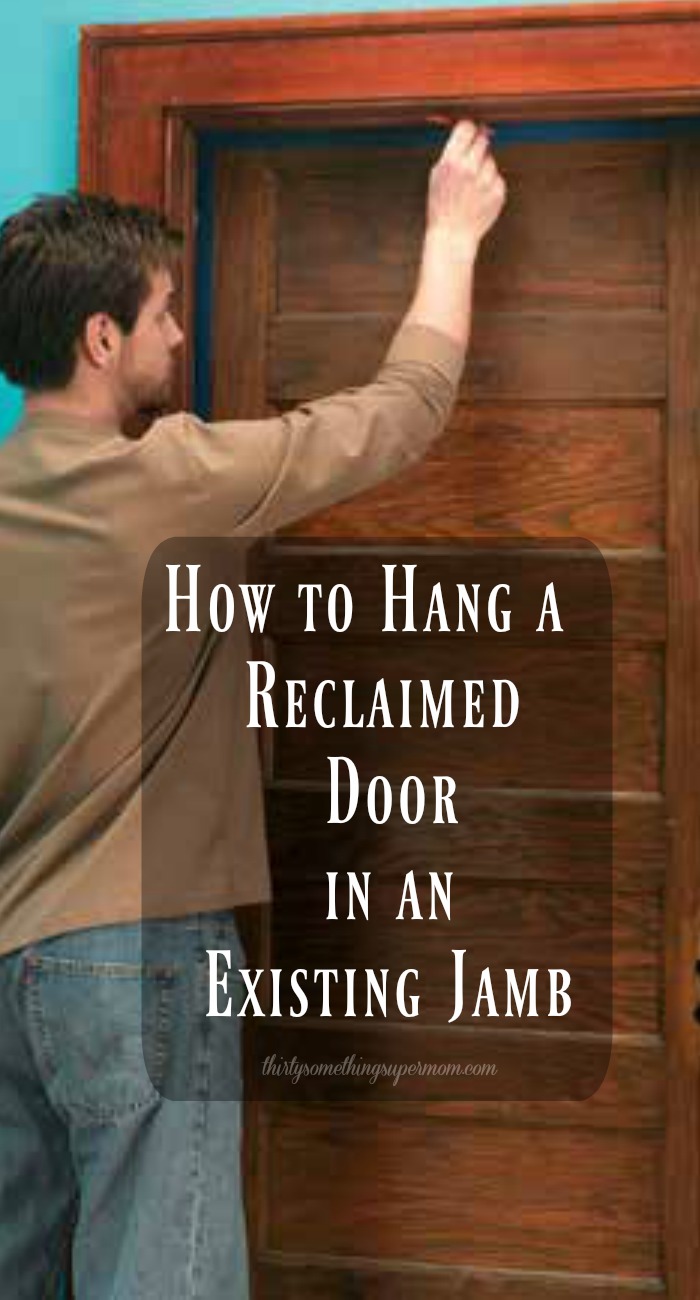
How to Hang a Reclaimed Door in an Existing Jamb
Adapting a door, especially an antique door, to an existing opening can be tricky.
The older the door, the more likely it is to be an unusual size and the greater the chance that the door will be out of true.
Doors are inevitably used in high-traffic areas that stress the wood and structure on an almost-constant basis.
Doors get slammed, we run things into them, and gravity is forever pulling a door away from its mountings.
Add to that the fact that exterior doors are subject to the elements, and it’s almost amazing that there are actually older doors from which to choose.
But there are, and they can be magnificent.
Tips for Hanging a Vintage Door
A vintage door may have unusual panel configurations, exceptional glass treatments, or a spectacular aged finish.
Any of these can add a truly unique look to the home, in or out. Unfortunately, they are subject to another consideration after you get them home—actually fitting inside the opening.
It’s not just a matter of size, although that’s the key issue. The problem is that the opening itself is affected by the same stresses that plague a door.
Houses settle and shift.
Water damage and physical abuse from day-to-day wear and tear take their toll, and eventually, any opening can become distorted to one degree or another.
That’s why we’ve used the most accommodating way to mount an old door in a newer opening for the project that follows.
Process of Hanging a Reclaimed Door in an Existing Jamb
The process outlined is designed to remove the least amount of door material, maintaining the character and style as much as possible.
It’s also an easy process to follow—you don’t have to be an accomplished woodworker to achieve a solidly executed, easy-to-open retrofit.
You should have, however, a helper, who will make the work much easier and less frustrating to do. Old, solid wood doors can be heavy, and trying to stabilize one while taking measurements or lining up a hinge can be a real challenge.
A couple of extra hands can make all the difference.
How to Hang a Reclaimed Door in an Existing Jamb
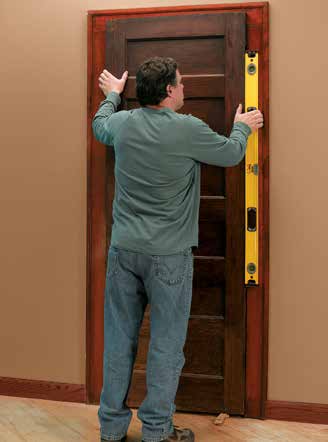
Step 1
Use a helper to hold the door against the jamb from the inside. Shim the bottom of the door approximately ½” so that the door is level with the jamb, not the floor.
Center door in the opening.
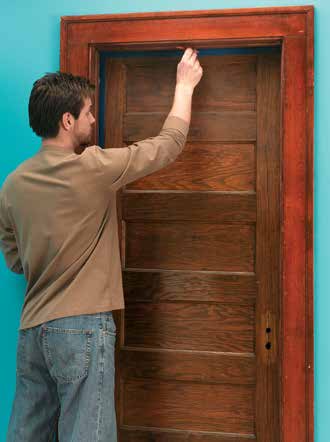
Step 2
Mark the top and side cut lines on the door, along the inside edge of the doorframe. Mark the front of the door with colored masking tape.
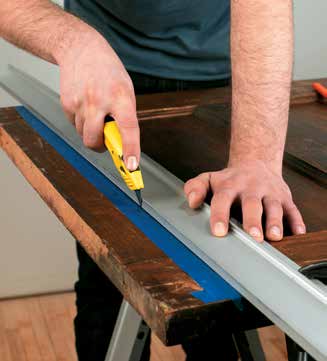
Step 3
Lay the door across sawhorses, or on a flat, level work surface with the tape side facing up.
Use a pencil compass and straightedge to transfer the cut lines on the front of the door to the back (adjust the compass for several points along the line to make equivalent reference points on the back).
Then scribe the lines, front and back, with a utility knife and a straightedge.
Use the Right Tools for the Job
Step 4
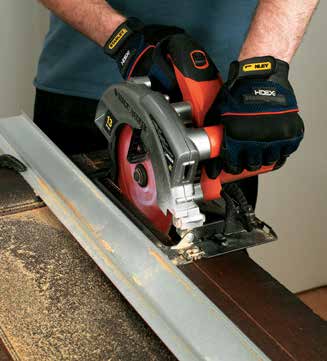
Trim the top of the door with a circular saw equipped with a fine-cutting blade.
Use a clamped straightedge to guide the saw base, and keep the cut ¹/16″ on the waste side.
If the edges of the door need more than ¼” removed, trim the edges in the same way.
Step 5
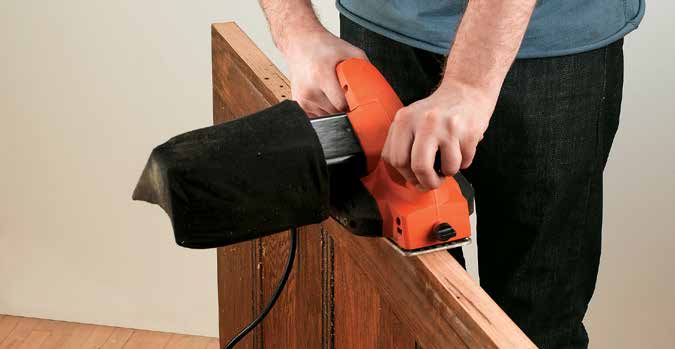
Use a power or hand plane to plane down all the edges to the actual cut line.
Set the door in position to check fit, and plane more as needed.
Use a file or sandpaper to bevel the cut edges slightly to prevent splintering.
Step 6
Position the door in the opening and mark the hinge locations. Use a combination square to outline the new hinge mortise on the door edge.
This may entail enlarging an existing mortise. Score the edges of the new mortise or modified outline with a utility knife and use a sharp chisel and hammer to modify or cut the new hinge mortise.
Option: If an existing hinge mortise overlaps the new mortise, the existing mortise may be too deep, creating an uneven bed for the hinge leaf.
In this case, you’ll need to install cardboard or scrap wood shims under the edge of the hinge leaf that overlaps onto the deeper, older mortise
Step 7
Screw the hinges into place on the door and hang the door by having a helper tip it into position against the door jamb so that the top hinge leaf sits in the top jamb mortise.
Drive one screw into this leaf, then set the other hinge leaves into place and install all the remaining screws.
Step 8
If you are using the reclaimed door’s lockset, or one that fits its holes, chisel a new strikeplate mortise or modify the existing mortise to take the new strikeplate.
Install the lockset and strikeplate.
For more projects like this pick up a copy of BUILDING WITH SECONDHAND STUFF: How to Reclaim, Repurpose, Re-use & Upcycle Salvage & Leftover Materials.
I hope this post has inspired you and helped you learn How to Hang a Reclaimed Door in an Existing Jamb.
More DIY Projects for the Home
Ready for your next exciting DIY project? Explore more creative ideas to enhance your home decor and bring your space to life!
Try your hand at crafting a stunning accent wall with this DIY Wall Decor: Wood Accent Wall tutorial – a quick and affordable project that transforms your space in less than an hour for just $75.
If you’re looking to add a touch of style without any sewing involved, our DIY Ottoman Makeover is a must-try.
Discover the beauty in simplicity with our DIY Rope Basket post, where a dollar store find becomes a stylish home accessory.
For those who love upcycling, check out How to DIY a Pallet Bedframe to learn how to create a rustic bed using reclaimed pallets.
Get inspired by this DIY Furniture Makeover where an old TV entertainment center is brilliantly repurposed into a trendy buffet.
Unleash your creativity and dive into these projects – your home will thank you for it!
Don’t forget to follow along on social media Pinterest|Facebook|Twitter|Instagram|YouTube|TikTok and subscribe to the free newsletter so that you never miss another post.
What projects are you working on? Have you learned how to hang a reclaimed door? I would love to hear about them in the comments!
How to Hang a Reclaimed Door in an Existing Jamb
These step-by-step instructions, coupled with the right tools and materials, will guide you smoothly through the process of installing a reclaimed door in an existing door jamb.
Materials
- Shims
- Lockset
- Strikeplate
- Cardboard or scrap wood shims (if needed)
Tools
- Helper
- Pencil compass and straightedge
- Colored masking tape
- Sawhorses or a flat, level work surface
- Circular saw with a fine-cutting blade
- Clamped straightedge
- Power or hand plane
- Utility knife
- File or sandpaper
- Combination square
- Chisel and hammer
- Screwdriver
Instructions
Begin by enlisting a helper to hold the door against the jamb from the inside. Ensure the door is leveled with the jamb by shimming the bottom approximately ½”, focusing on alignment with the jamb rather than the floor. Center the door within the opening.
Next, mark the top and side cut lines along the inside edge of the doorframe, using colored masking tape on the front of the door to aid in the process.
Lay the door on sawhorses or a flat, level work surface with the taped side facing up. Utilize a pencil compass and straightedge to transfer the cut lines from the front to the back of the door. Scribe these lines on both sides using a utility knife and straightedge.
To ensure precision, trim the top of the door with a circular saw fitted with a fine-cutting blade. Use a clamped straightedge as a guide, maintaining a ¹/16″ cut on the waste side. If necessary, trim the edges similarly, ensuring the removal of no more than ¼”.
Use a power or hand plane to shave down all edges to the actual cut lines. Fit the door in position, making adjustments as needed. Bevel the cut edges slightly using a file or sandpaper to prevent splintering.
Position the door in the opening and mark the hinge locations. Employ a combination square to outline the new hinge mortise on the door edge, potentially enlarging an existing mortise. Score the edges with a utility knife, and use a sharp chisel and hammer to modify or cut the new hinge mortise.
Optional: If an existing hinge mortise overlaps the new mortise, and it's too deep, install cardboard or scrap wood shims to level the hinge leaf.
Secure the hinges onto the door and hang it with the assistance of a helper. Ensure the top hinge leaf sits in the top jamb mortise before securing all remaining screws.
If using the reclaimed door's lockset or one that fits its holes, chisel a new strike plate mortise or modify the existing one to accommodate the new strike plate. Install the lockset and strikeplate to complete the installation.
Notes
Enhance your project by taking the time to carefully measure and plan each step. Accuracy is key, so double-check your markings and measurements before making any cuts. Additionally, consider applying a protective finish to your reclaimed door to enhance its durability and aesthetic appeal.
Recommended Products
As an Amazon Associate and member of other affiliate programs, I earn from qualifying purchases.


About Thirty Something Super Mom

My journey started after a Crohn's disease diagnosis, inspiring a commitment to well-being. This site shares my distinctive approach to healthy living with my collection of nutritious recipes that boast authentic flavors, mimicking the indulgence of traditional dishes. I love sharing guilt free recipes for low carb, keto, gluten-free, paleo, and the specific carbohydrate diet. I also share tips on natural living, including homemade cleaners and cleaning hacks. I also share my experience as a veterinary technician and pet groomer, to integrate pet health tips, homemade dog food recipes, and grooming insights to ensure your pets thrive.
I love DIY, sometimes I have better results than other times though.
Thanks for the great giveaway !
I love the fact that this uses reclaimed doors. Thanks so much for sharing this, I can’t wait to try it.
DIY projects are great. I need a book to show me what to do.
This books looks like it’s right up my alley!
What an awesome book. I am excited to see all the ideas.
My husband would love this book, frugal & diy, right up his alley!
The book looks cool!! Maybe this could be my husband’s new hobby! It’s great to reuse older items! Keep it out of the landfill! kristiedonelson(at)gmail(dot)com Thank you. Happy Spring!
Commented on: http://thirtysomethingsupermom.com/lemonade-recipe/#comment-52437
kristiedonelson(at)gmail(dot)com Thank you. Happy Spring!
My husband would love this
Amazing thanks for these great tips…
what a useful book! we are always trying to diy and repurpose old materials to fit current needs
What an awesome book! 😀
My whole house is a DIY project.
I would love to check out this book! I’m all about renewing what I have.
This would be great to win!
I would like to have this book.
I love DIY projects.
I would love this book! Sounds awesome!
Would be nice to read about some DIY Projects!
Love repurposing. Would love to read this
I think this is something that my Dad would definitely enjoy reading. I love DIY projects also.
Although this is not a project that I would do, I enjoyed reading about it. Looks like it was worthwhile.
Great ips! We went to an auction at an old school being deolished, they had the most magnificent old doors. Oddly, noone was much interested. I wish we had more room because I wanted every single one. Hubby is a carpenter and has done this many times. It isnt tough just good measuring and they look so nice.
I would love to have been there, I am looking for old doors, I love them too!